

3D Printer DC Blower
In fused deposition modeling (FDM) 3D printing, achieving pristine surface finishes, razor-sharp details, and flawless overhangs depends heavily on efficient thermal management. While print bed adhesion, extruder step calibration, and slicer settings are fundamental, part cooling remains the ultimate defining factor for print quality. This comprehensive technical guide explores why the specialized 3D printer DC blower has become an essential hardware standard across consumer desktop setups, custom CoreXY builds, and industrial additive manufacturing systems.
1. Why FDM 3D Printers Require High-Static-Pressure DC Blowers
FDM printing operates by extruding thermoplastic filaments—such as PLA, PETG, ABS, and TPU—at elevated temperatures. The moment molten plastic leaves the nozzle and deposits onto the build plate, it must undergo rapid, controlled solidification. Failure to cool the extruded filament immediately results in thermal degradation, layer sagging, and geometric inaccuracies.
Standard axial fans, which are commonly bundled with entry-level 3D printers, push air parallel to their rotation axis. While axial fans excel at moving high volumes of air in open environments (such as cooling mainboards or power supply units), they perform poorly when forcing air through confined spaces. Modern print heads feature compact hotends, tightly routed fan shrouds, and tiny duct nozzles. These physical restrictions create substantial aerodynamic backpressure.
Key Aerodynamic Fact: Axial fans lose up to 80% of their airflow when encountering narrow ducting backpressure. Centrifugal DC blowers utilize radial impellers to generate high static pressure, overcoming internal air resistance to deliver focused air directly below the nozzle.
Without sufficient static pressure, cooling air dissipates inside the print head housing before reaching the molten target. This deficiency manifests as several common FDM printing defects:
- Curling and Warping: Slow cooling causes internal thermal stress, pulling corners upward.
- Poor Bridging Performance: Unsupported filaments sag downward across gaps due to delayed solidifying.
- Stringing and Oozing: Inadequate local cooling prevents quick freezing at retraction points.
Dimensional Inaccuracy: Melted plastic slumps under gravity, distorting fine features and tolerances.
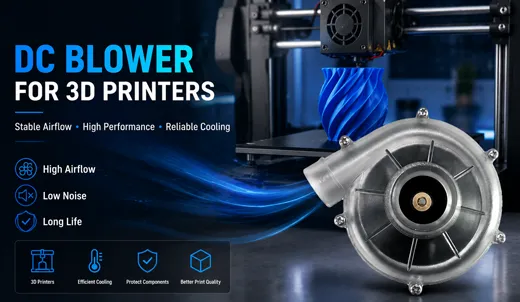
2. Centrifugal DC Blowers vs. Axial Fans: Structural & Aerodynamic Analysis
To understand why a mini air blower outperforms an axial fan in part cooling, we must compare their internal mechanics, airflow trajectories, and pressure curves.
Axial fans feature propeller blades that draw air in from one side and discharge it linearly along the same axis. In contrast, a centrifugal cooling blower fan pulls air axially into the center of its scroll housing (volute) and accelerates it radially at a 90-degree angle using centrifugal force. The scroll housing compresses the air stream before shooting it through a single, focused rectangular outlet.
| Performance Metric | Centrifugal DC Blower Fan | Standard Axial Fan |
|---|---|---|
| Primary Airflow Trajectory | Radial / Centrifugal (90° Direction Change) | Axial / Linear (Straight-through) |
| Static Pressure Capability | High to Very High (1.5 kPa – 3.5+ kPa) | Low to Moderate (< 0.5 kPa) |
| Backpressure Resistance | Exceptional; maintains flow inside complex ducts | Poor; stalls and recirculates under backpressure |
| Best 3D Printing Application | Part cooling, hotend heat sink ducts, chamber exhaust | Mainboard cooling, PSU heatsinks, unshielded air movement |
| Typical Voltage Options | 12V DC, 24V DC (High Efficiency) | 5V, 12V, 24V DC |
| Air Delivery Profile | Concentrated, narrow, high-velocity jet | Broad, wide-angle dispersion |
When selecting cooling hardware for 3D printers, placing an axial fan on a narrow duct is inefficient. The airflow encounters resistance, bounces backward off the duct walls, and creates turbulent stalls. A high-pressure 24V DC blower effortlessly overcomes this restriction, maintaining dynamic flow rates right down to the tip of the nozzle duct.
3. Technical Selection Criteria for 3D Printer DC Blowers
Engineers, DIY builders, and OEM equipment integrators must evaluate several technical specs to select the ideal 24V DC blower fan or 12V mini air blower model.
Operating Voltage: 12V vs. 24V DC Architecture
While legacy 12V mini air blowers remain common on basic DIY printers, modern high-speed CoreXY machines (such as Voron, Bambu Lab, and Creality K1 series) rely almost exclusively on 24V DC power architectures. Operating at 24 volts offers key advantages:
- Lower Current Draw: A 24V blower draws half the current of a 12V blower at equivalent wattage, significantly reducing resistive heating along long printhead wiring harnesses.
- Reduced Voltage Drop: Thinner wire gauges can be used without suffering performance loss across energy chains.
- Superior Torque and Acceleration: 24V brushless DC motors spin up to maximum RPM faster, enabling immediate cooling adjustments during rapid speed transitions.
Static Pressure and P-Q Curves
Never rely solely on zero-impedance CFM (Cubic Feet per Minute) ratings provided in marketing materials. Always review the P-Q (Pressure vs. Flow Rate) performance curve provided in technical datasheets. Look for the working static pressure point under simulated duct resistance. For standard print speeds (60–100 mm/s), a static pressure rating of at least 1.5 kPa is recommended. For high-speed printing (>300 mm/s), select high-performance blowers offering 2.5 kPa to 4.0 kPa.
PWM Speed Control and Firmware Compatibility
Different filaments demand distinct thermal profiles. While PLA requires 100% full-throttle cooling, materials like PETG prefer moderate airflow (30–50%), and ABS/ASA require virtually zero part cooling to prevent layer separation. Ensure your chosen 3D printer DC blower supports 4-pin PWM signal modulation or 0-5V speed control for smooth, linear scaling from low idle RPMs up to full power within Marlin, Klipper, or RepRapFirmware.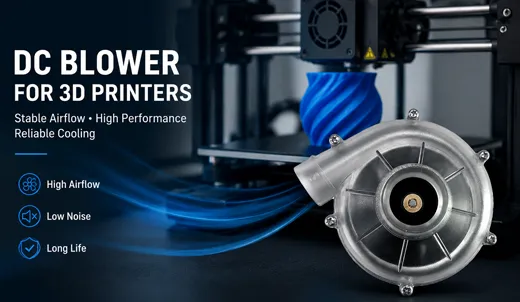
Bearing System Durability
Printheads undergo aggressive rapid acceleration, multi-axis inertia shifts, and continuous vibration. The internal bearing system determines the operational lifespan and acoustic performance of your blower:
- Dual Ball Bearings: The industry gold standard for commercial and high-duty-cycle setups. Delivers 50,000+ hours of continuous operation, resists omnidirectional gravitational forces, and tolerates elevated chamber ambient temperatures.
- Hydraulic Bearings: A cost-effective alternative for hobbyists, offering low operational noise at moderate lifespan ratings (25,000–30,000 hours).
- Sleeve Bearings: Not recommended for moving printheads. Sleeve bearings degrade rapidly under multi-axis orientation shifts and high-vibration environments.
4. Mitigating Common FDM Print Failures via Enhanced Blower Cooling
Integrating a high-performance cooling blower fan addresses several persistent 3D printing failures directly at the physical layer.
Bridging and Severe Overhang Collapse
When an FDM extruder bridges across open space between two points, it relies entirely on immediate air quenches to lock the molten filament line in tension. If the airflow velocity or static pressure is insufficient, the molten string sags into an unsightly droop. Upgrading to a high-pressure 24V DC blower instantly freezes the plastic strand mid-air, enabling long unsupported bridges without dedicated support structures.
Heat Creep and Hotend Clogging
Heat creep occurs when thermal energy from the heater block migrates upward through the heatbreak into the cold zone, causing raw filament to soften and expand prematurely above the melting chamber. Although primary heatbreak cooling uses dedicated fans, dual-outlet blower ducts often redirect a portion of localized airflow toward the lower heatsink fins. Maintaining stable, high-pressure air through these secondary vents safeguards the cold-zone transition barrier, preventing catastrophic heat creep blockages.
5. Integration Step-by-Step Guide for Custom & OEM Installations
Upgrading your FDM 3D printer with an advanced centrifugal mini air blower requires a structured methodology to maximize aerodynamic efficiency:
- Assess Physical Clearance: Measure the space available on your printhead carriage. Popular form factors include 4010 (40x40x10mm), 5015 (50x50x15mm), and 9733 industrial blowers for ultra-high-speed setups. Ensure full Z-axis clearance without colliding with gantry extrusions or inductive leveling probes.
- Verify System Electrical Ratings: Confirm whether your mainboard fan MOSFET headers output 12V or 24V DC. Connecting a 12V blower to a 24V header will permanently burn out the internal driver board, while running a 24V fan on a 12V line results in severe under-speed operation. Detailed technical documentation and specs can be retrieved at TKFAN 24V Air Blower Section.
- Optimize Fan Duct Geometry: Design or select a fan shroud featuring smooth internal curves, gradually tapering transitions, and symmetrical dual vents. Avoid harsh 90-degree internal elbows that introduce turbulent drag and pressure loss.
- Calibrate Slicer Profile Settings: Adjust minimum layer times and speed-dependent fan curves within your preferred slicer (OrcaSlicer, PrusaSlicer, or Cura). Configure maximum RPM for PLA, moderate levels for PETG, and low or zero output for ABS/ASA.
6. Technical Frequently Asked Questions (FAQ)
Q1: What is the primary difference between a DC blower and a standard axial fan in 3D printing?
A DC blower uses a centrifugal impeller to pull air axially and discharge it at a 90-degree angle, generating high static pressure to force air through tight ducts. An axial fan moves large volumes of air linearly but fails to overcome duct backpressure, making blowers superior for targeted part cooling.
Q2: Why is 24V DC preferred over 12V DC for modern 3D printer blowers?
24V DC blowers operate at half the electrical current of 12V blowers for the same power output. This lowers resistive wire heating, reduces voltage drops across long drag-chain cables, provides higher motor torque, and ensures stable high-RPM operation during long print runs.
Q3: Can I run a high-pressure 24V DC blower directly from my mainboard's PWM fan header?
Yes, provided your mainboard fan header supports 24V DC output and the onboard MOSFET can handle the current draw of the blower. Most modern 3D printer control boards (e.g., BigTreeTech, Makerbase, Duet) support direct PWM control for 24V fans.
Q4: How does static pressure affect overhang and bridge quality?
Higher static pressure enables the cooling blower to force velocity-rich air through tight duct tips directly onto freshly extruded plastic. This rapid heat extraction solidifies the filament instantaneously, preventing droop across open gaps and maintaining sharp overhang angles.
Q5: Which bearing system should I select for a high-acceleration CoreXY 3D printer?
Dual ball bearings are strongly recommended for high-acceleration printheads. They endure multi-axis movement, resist vibration wear, tolerate higher ambient chamber temperatures, and offer operational lifespans exceeding 50,000 hours.
Q6: What causes air blowers to produce high-pitched whining noise, and how can it be reduced?
Whining noise is typically caused by high-frequency PWM switching or aerodynamic turbulence inside restrictive duct pathways. It can be minimized by enabling hardware PWM smoothing in firmware , choosing high-quality brushless DC blowers, and streamlining duct geometry.
Q7: Is full part cooling recommended for engineering plastics like ABS and ASA?
No, aggressive cooling on ABS or ASA causes severe thermal shock, leading to layer delamination, cracking, and corner warping. Blowers should either be turned off completely or run at very low speeds (10–20%) in enclosed heated chambers for these materials.
Q8: What is the difference between internal driver and external driver DC blowers?
Internal driver blowers integrate the control electronics within the fan hub, making wiring simple and compact. External driver blowers isolate the drive circuitry onto a separate board, allowing the motor to handle extreme high-power loads and elevated chamber temperatures without overheating the electronics.
Q9: Can a cooling blower fan cool the hotend too much and trigger thermal runaway errors?
Yes, if the duct directs high-velocity airflow directly onto the heater block rather than beneath the nozzle tip, it can drop the heater block temperature, triggering a controller thermal runaway alarm. Installing a silicone protective sock around the heater block prevents this issue.
Q10: How do I read a blower's P-Q curve when choosing hardware for my custom 3D printer?
Find the expected system backpressure on the vertical Y-axis (static pressure) and trace across to the curve to identify the actual airflow output (CFM or m³/h) delivered on the horizontal X-axis. Choose a blower that maintains strong flow under your specific duct resistance level.
GET A QUOTE